System Roles
Referencias:
https://access.redhat.com/documentation/en-us/red_hat_enterprise_linux/9/html-single/automating_system_administration_by_using_rhel_system_roles/index
Requisitos:
- Red Hat Enterprise Linux 9.x
Prepara el ambiente (realizar en bastion)
-
Poder administrar via SSH por medio de llaves y configurado un usuario con SUDO.
NOTA: Hacer referencia a secciones anterior de este curso.
-
Instalar Ansible Core.
sudo dnf install ansible-core - Instalar Roles del Sistema:
dnf install rhel-system-roles
Crear inventario
En el directorio: ~/system-roles.
- Archivo:
inventory - Contenido:
[webservers]
student-X-servera
Playbook Time Sync
En el directorio: ~/system-roles.
- Archivo:
test-timesync.yaml - Contenido:
---
- name: Managing time synchronization
  hosts: webservers
  become: True
  tasks:
    - name: Configuring NTP with an internal server (preferred) and a public server pool as fallback
      ansible.builtin.include_role:
        name: redhat.rhel_system_roles.timesync
      vars:
        timesync_ntp_servers:
        - hostname: time1.google.com
          trusted: yes
          prefer: yes
          iburst: yes
        - hostname: time2.google.com
          trusted: yes
          prefer: yes
          iburst: yes
Ejecución
- Validar sintaxys.
ansible-playbook -i inventory test-timesync.yaml --syntax-check - Ejecutar en Modo Check con dos niveles de verbose
-vv.ansible-playbook -i inventory test-timesync.yaml --check -vv - Ejecutar el Playbook.
ansible-playbook -i inventory test-timesync.yaml - Validar configuración aplicada por el rol.
Debera obtener una salida similar a:
ssh student-X-servera 'sudo chronyc sources'Notar que han sido aplicados los cambios, sin tener que escribir las tareas en ansible. Reutilizando los roles del systema.MS Name/IP address Stratum Poll Reach LastRx Last sample =============================================================================== ^* time1.google.com 1 6 77 25 -294us[-1021us] +/- 1936us ^- time2.google.com 1 6 77 24 -2038ns[-2038ns] +/- 14ms
Playbook Enable Cockpit
En el directorio: ~/system-roles.
- Archivo:
test-cockpit.yaml - Contenido:
---
- name: Manage the RHEL web console
  hosts: webservers
  become: True
  tasks:
    - name: Install RHEL web console
      ansible.builtin.include_role:
        name: redhat.rhel_system_roles.cockpit
      vars:
        cockpit_packages: default
        cockpit_port: 9051 # Puerto defecto 9090
        cockpit_manage_selinux: true
        cockpit_manage_firewall: true
Ejecución
- Validar sintaxys.
ansible-playbook -i inventory test-cockpit.yaml --syntax-check - Ejecutar en Modo Check con dos niveles de verbose
-vv.ansible-playbook -i inventory test-cockpit.yaml --check -vv - Ejecutar el Playbook.
ansible-playbook -i inventory test-cockpit.yaml - Validar configuración aplicada por el rol.
ssh student-X-servera 'sudo systemctl status cockpit' ssh student-X-servera 'sudo systemctl restart cockpit' -
Utilice un tunnel hacia el bastion. (Desde su estación de trabajo personal)
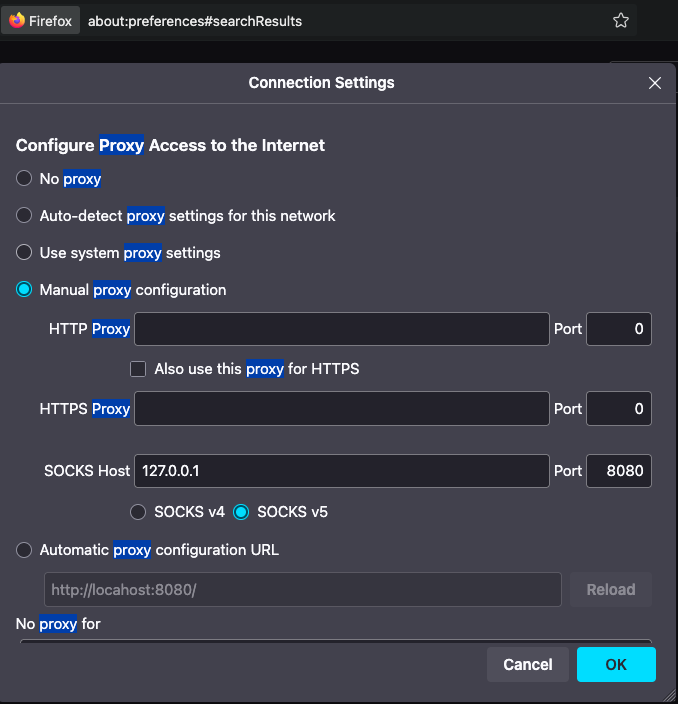
NOTA: Adapte estas instrucciones al cliente que esté utilizando.ssh student@FQDN_OR_IP_BASTION -i keys/student-X-private_key.pem -D8080 -
Obtenga en FQDN de
student-X-servera. (desde el bastion)ssh student-X-servera 'hostname -f' -
Configure su Browser para utilizar el Tunnel como un Proxy.
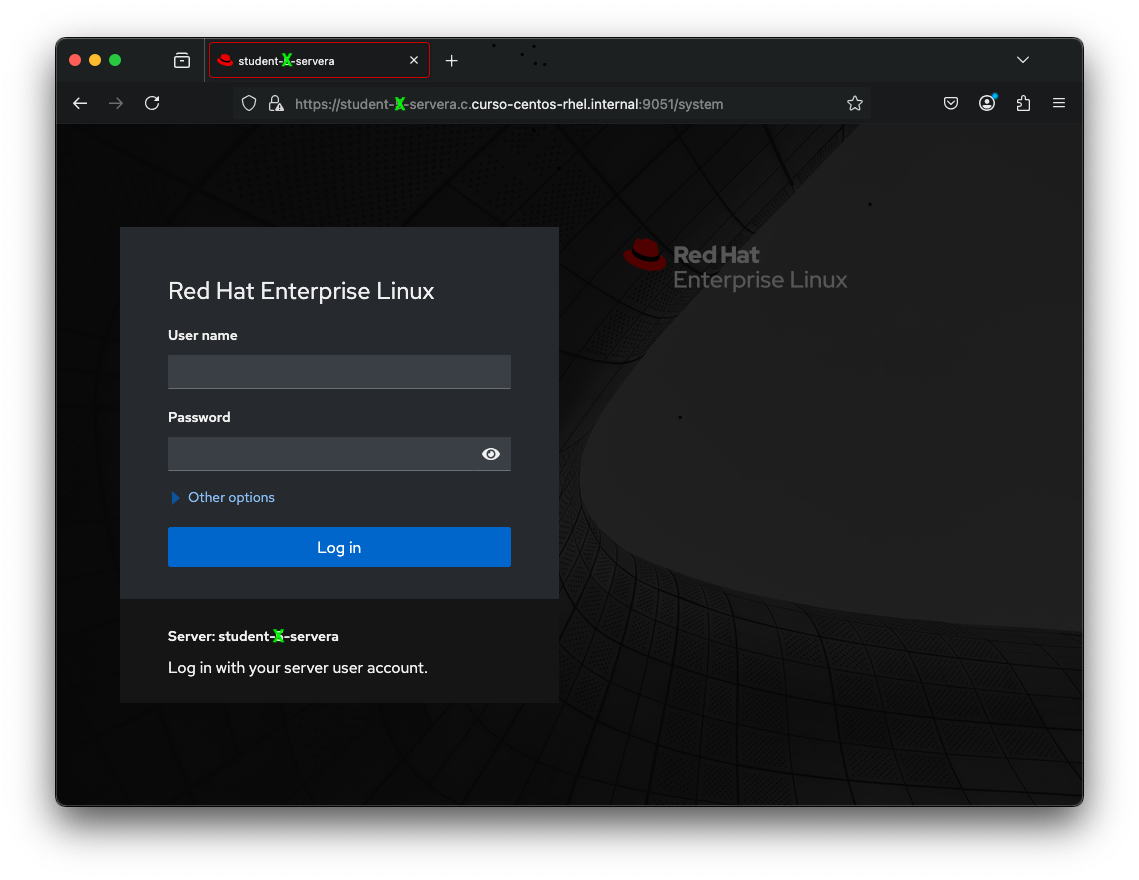
- Utiliar su browser para acceder al servicio de cockit en
student-X-servera.